How to add your DLC email account as a connected account inside of Gmail
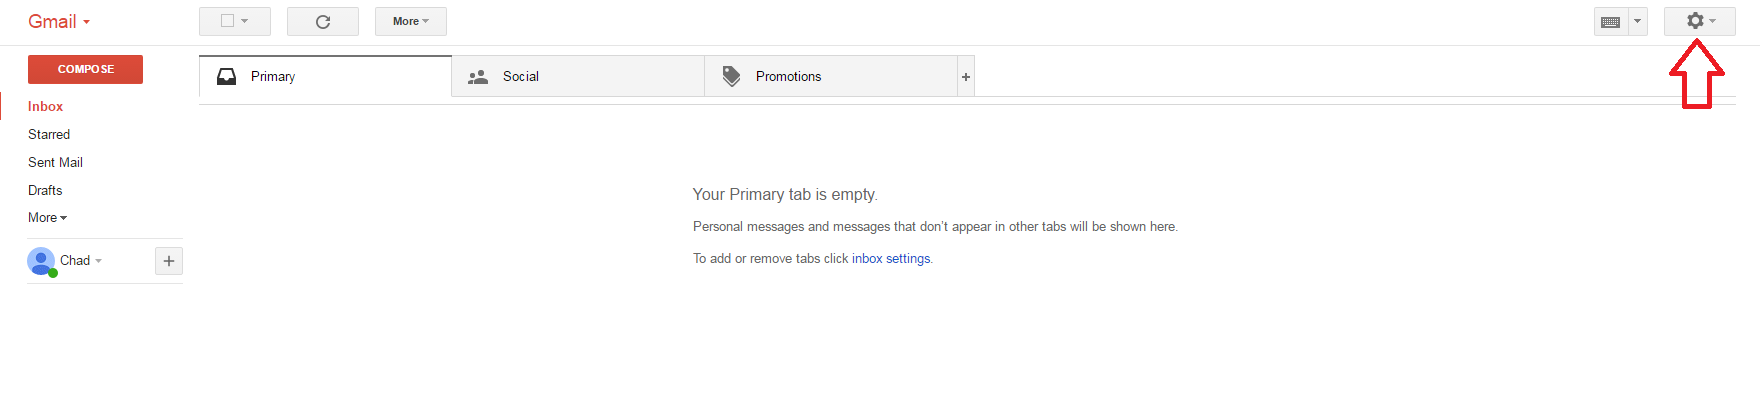
1. First, please remove the forwarder from your DLC email account by logging into your Rackspace webmail(apps.rackspace.com) then log in to your Gmail account and navigate to your inbox. On the top right-hand corner of your inbox, you should see a Gadget icon that represents settings. Click on this and then click “Settings”.
2. Once you navigate into settings, choose the tab labeled “Accounts and Import”
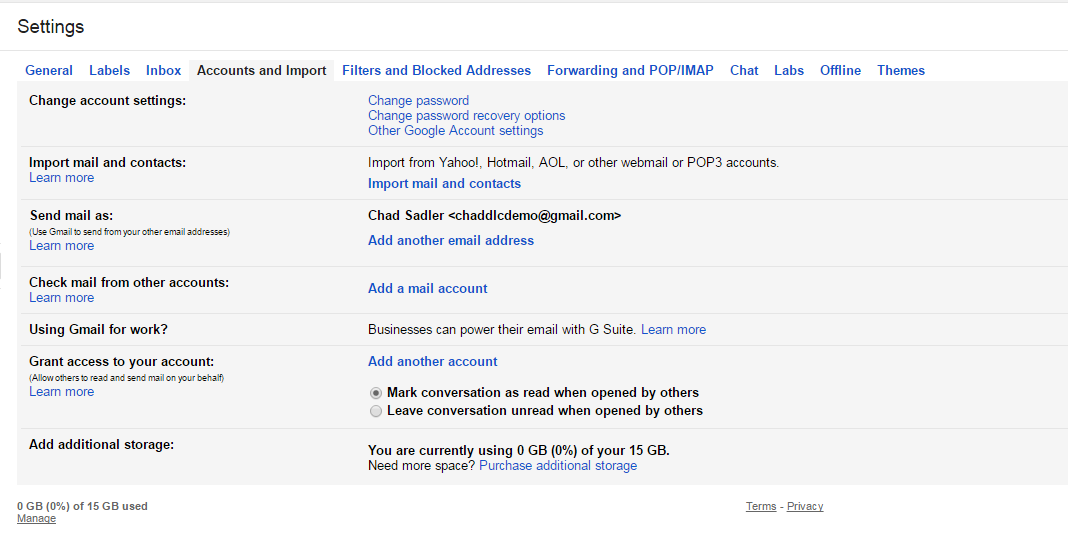
3. Click “Add a mail account” inside of the labeled area for “Check mail from other accounts:”
4. Next, you should have a new window that has popped up which looks like the following:
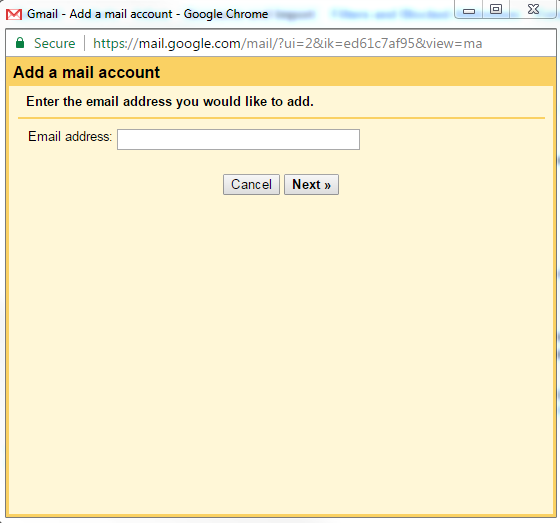
5. Please type in your Email address and click “Next”
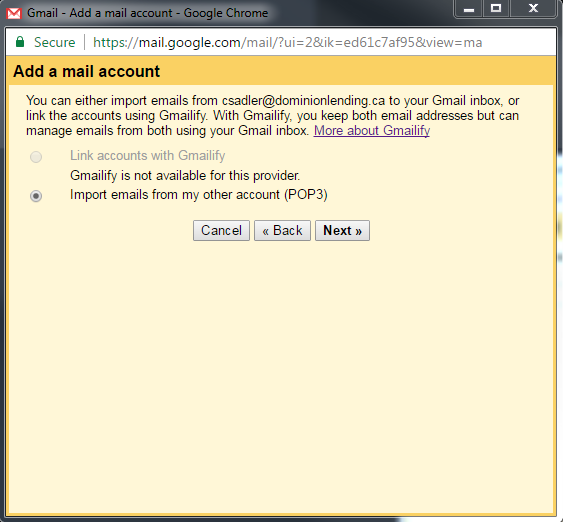
6. In the following prompt, you’ll choose “Import emails from my other account (POP3)”. And click “Next”.
7. Next, enter the account information into the following fields. Please fill it out as shown in the screenshot below only using your email address and password:
- Username: YourEmail@dominionlending.ca
- Password: ********* (your Rackspace Password)
- POP Server: Secure.emailsrvr.com
-
Port: 995
-
Check the f:
- Leave a copy of retrieved messages on the server(Check this option so that emails are saved on your dominion mailbox and Gmail can retrieve your emails)
- Always use a secure connection (SSL) when retrieving mail.
- Label incoming messages: youremail@dominionlending.ca
-
Check the f:
- Add Account
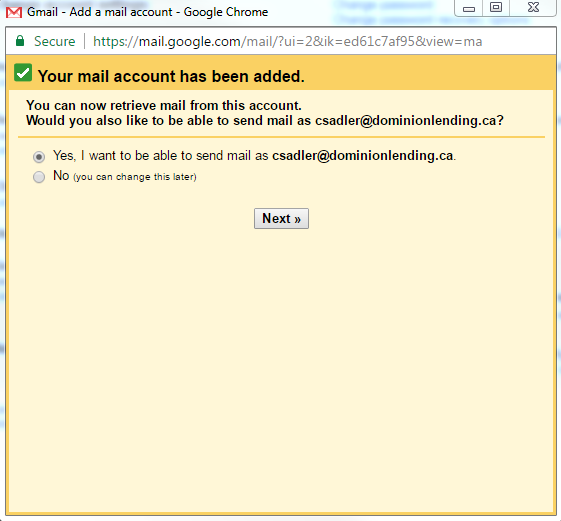
8. Next, A pop-up message will show up that states your mail account has been added.
9. Now you can set up your Gmail so you can send-as your DLC email account.
10. Check the box which says “Yes, I would like to send mail as broker@dominionlending.ca” and click “Next”.
11. Now, choose what name shows up when we send under this email account (we recommend using your name)
Also, UNCHECK the “Treat as an alias”.
12. The next step is to set up the outgoing settings. Please see the screenshot below and add the information accordingly:
13. When you click next, it should check your credentials with the outgoing server. If everything worked, you should be on a new window that is asking for you to click a verification link or provide a verification code.
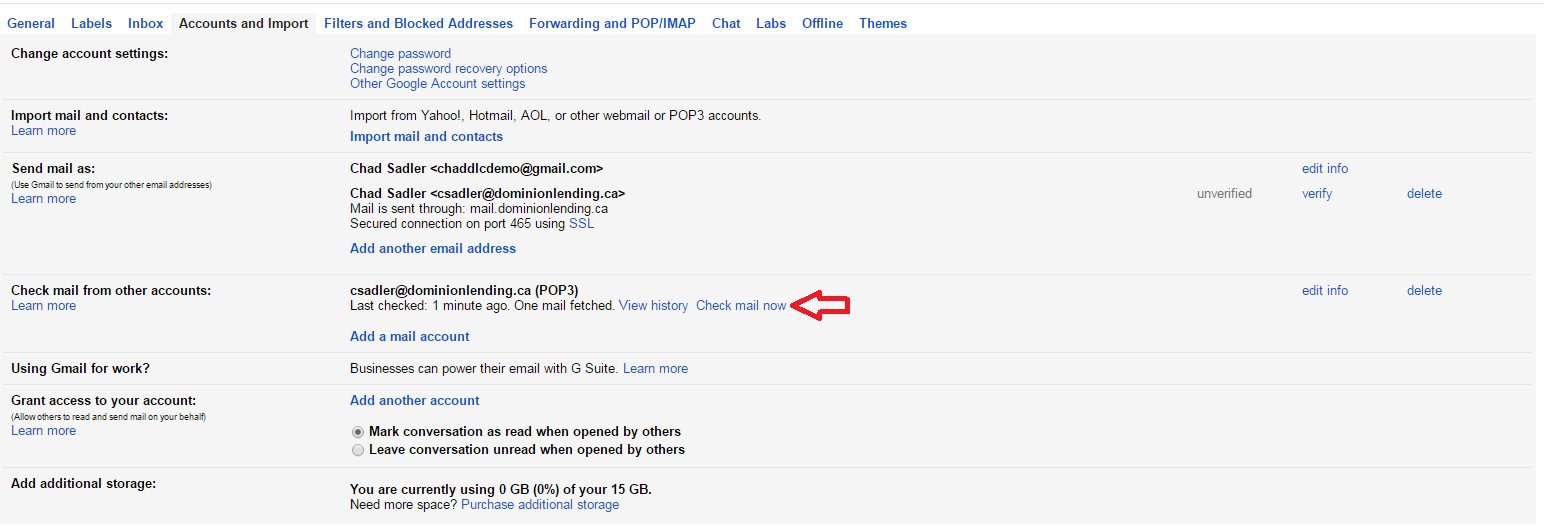
14. You should be able to find this verification email by going back into your “Accounts and Import” section of settings and clicking on the “Check mail now” option for your DLC mailbox.
15. The email should look like the following:

Once you click the verification link inside of this email, you will now be able to send emails through your DLC account using Gmail.
You’re done!