Addition of Widget
First you will need to access your website editor. If you don't know how to do so, you can read this article
Next, you will need to access your front page editor. If you don't now how to do so, you can read this article
Before adding a widget, we'll need to create a new row for the widget to be placed inside of. You have a few options when creating a row. These options allow you to place more than one widget across your page. To add a new row, use the "Add Row" button
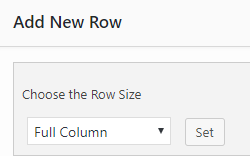
Next use the drop-down menu to choose the type of row to use. We'd recommend selecting full column or two half columns
Now click Insert in the bottom right hand corner and you will see a new row that does not have any widgets inside of it. If you do not place any widgets in this row then you won't see any effect to your front page.
To add a widget to this row, click on one of the empty spaces in the row and then click the "+Add Widget" button
After you’ve clicked “+Add Widget” a new window will pop up where you can choose from a variety of widgets including Forms, Calculators and Testimonials.
Once you have chosen the widget that you would like to add to your website it will appear inside of the row you have selected. If you do not have a row selected then the widget will show at the bottom of the page
If the widget is not showing up in the row as expected or if you'd like to move it, simply click and drag the widget to where you want it.
Once you have moved the widget to your desired location, on the right side of the website you will press the "Update" button to finalize these changes.
Removal of Widget
To delete widgets, once you are on the front page editor you will hover over the widget and select "Delete" as in the picture.
If you wish to delete a row of widgets, in the top right of the row, there is a wrench which you will hover over and will select “Delete.” It will ask twice if you are sure you want to delete that row.
Once you have deleted the desired widgets, on the right side of the website you will press the "Update" button to finalize these changes.